Step 3: Deployment File
The third step. Curate the deployment manifest that will go out with this release.
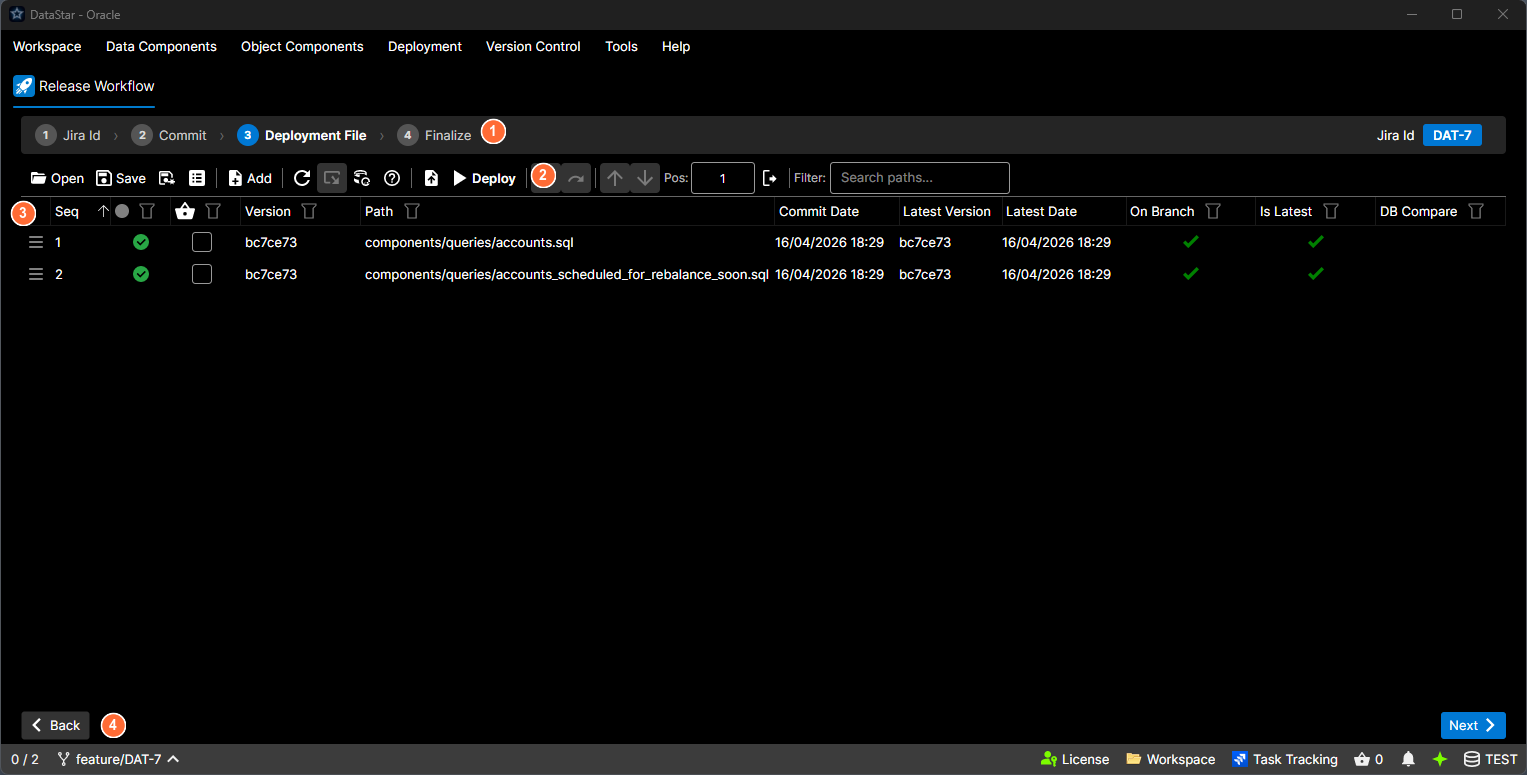
- Step indicator: numbered breadcrumb showing all four steps; Step 3 is highlighted.
- Toolbar: Open, Save, Add, Deploy, and positioning controls.
- Deployment grid: the components in this deployment, with version, path, and status columns.
- Back / Next: navigate between wizard steps.
What's on screen
This step embeds the full Deployment view directly in the wizard: the same grid, toolbar, and context menu you'd get from Deployment → New Deployment. If a deployment file already exists for this task, it's loaded automatically.
All the normal Deployment-view actions are available here:
- Add. Bring in components from the basket, a commit, a date range, a task, or the file system.
- Move Up / Move Down (Alt+↑ / Alt+↓). Reorder.
- Pos: textbox + Move To. Jump a row to a specific position.
- Update to Latest. Refresh a row against the current version.
- What If, Database Snapshot, SQL Export. Preview the deployment.
- Save / Save As / Export to Task. Persist the deployment file.
See ordering and filtering for the full detail on those actions.
Where the file is saved
Where the deployment file ends up is controlled by the Release tab of Workspace Settings:
- Task Attachment. Uploaded to the tracked task.
- Workspace Location. Written to a folder under the workspace root (using the configured Folder Pattern).
Moving on
Next advances to Step 4: Finalize.